Concept artists
You have a painted creature, prop, or vehicle and need a spatial blockout for a new angle.
Use the draft to test composition, lighting, and proportions before detailed sculpting.
image to 3d model freeReference to model
An image to 3d generator turns a visual reference into a 3D starting point, so you can inspect shape, proportions, and surface cues before refining the asset.

Workflow basics
The generator is most useful when you treat the result as a structured first pass rather than a perfect scan.
Use a clear image with the subject separated from its background and enough visible detail to suggest depth.
State the object, important features, preferred style, and any view or material cues that should survive conversion.
Check silhouette, hidden surfaces, thin parts, and scale before deciding whether the draft is ready for the next tool.
A/B comparison
The input and output serve different jobs: one carries visual evidence, while the other gives you editable spatial form.
Primary role
Reference image
Shows the subject as captured from one view
Generated 3D model
Represents the subject as a spatial object
Dimensional evidence
Reference image
Depth is suggested by shading, overlap, and perspective
Generated 3D model
Depth is expressed through geometry and surfaces
Hidden areas
Reference image
Usually unavailable or implied
Generated 3D model
Filled in by the model's best structural estimate
Surface appearance
Reference image
Provides direct color and texture cues
Generated 3D model
May approximate or simplify the visible finish
Editing options
Reference image
Crop, paint, or retouch pixels
Generated 3D model
Adjust form, camera, material, and topology
Best next use
Reference image
Reference, mood board, or visual target
Generated 3D model
Preview, blockout, scene layout, or further refinement
Result inspection
A convincing preview can still hide uncertainty. Compare the reference and result at the same scale before you rely on the asset.

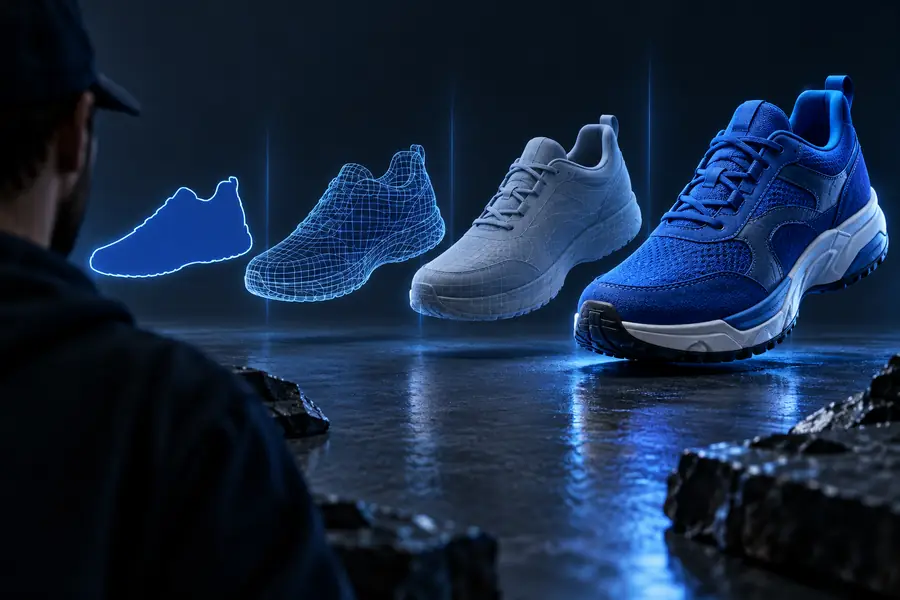 Reference
3D result
Reference
3D result
Drag the divider to inspect silhouette, detail, and missing surfaces.
Reference3D resultPractical workflows
Different users judge the same conversion differently. Start with the output requirement that matters most to your project.
You have a painted creature, prop, or vehicle and need a spatial blockout for a new angle.
Use the draft to test composition, lighting, and proportions before detailed sculpting.
image to 3d model freeA sketch or product reference needs to become a rough object for an early presentation.
A quick model gives the team something tangible to rotate, annotate, and revise.
image to 3d model freeA visual reference needs to become a placeholder asset for a scene or layout.
The generated form helps establish scale and placement while production assets are developed.
text to 3d model freeA single picture is easier to understand when students can inspect it as a basic 3D object.
The conversion creates a concrete starting point for discussing form, perspective, and modeling decisions.
text to 3d model freePlanning guide
Use the slider as a simple planning aid: more reference views create more visual checks before you accept a first-pass model.
checks
points
Format evolution
Today’s generators build on several ways of turning visual evidence into spatial form.
Early computer graphics systems established the mesh-based approach still used for many 3D assets.
Overlapping photographs began producing measurable geometry for surveying, heritage, and production work.
Machine-learning systems became better at inferring depth and structure from ordinary two-dimensional images.
AI-assisted workflows made image-guided 3D drafts accessible without requiring a full capture rig or manual blockout.
Output checkpoints
A generated model is easier to judge when you inspect the same core properties every time.
Make the first pass
Bring a useful image, describe the features that matter, and send the first draft into your review workflow. The goal is not to replace craft; it is to shorten the distance between an idea and something you can inspect.
Generate 3D modelCommon questions
An image to 3D generator uses a two-dimensional reference to create a preliminary three-dimensional object. It estimates depth, shape, and hidden structure, so the result should be reviewed rather than treated as a perfect scan.
A clear image with one main subject, visible edges, and limited obstruction is usually easier to interpret. Multiple angles can provide more evidence, but a strong single reference is a practical starting point.
It can be useful immediately for concept blocking, scene layout, visual review, and early presentations. Production use may require cleanup of topology, scale, materials, thin parts, and areas that were not visible in the reference.
The generator must infer information that the image does not show, especially the back, underside, internal structure, and exact dimensions. Lighting, perspective, background clutter, and ambiguous details can also affect the reconstruction.